
Photoshop is an amazing creative tool and it can be especially helpful for rookie photographers. However, it’s also complex enough that some people are intimidated out of using it. If you’ve wanted to use the program as a photographer but haven’t, look no further than here for tips on how to improve your photos with photoshop.
RAW vs JPEG
First things first. If you want to improve your photos with photoshop, you need to be taking photos in RAW format instead of JPEG.
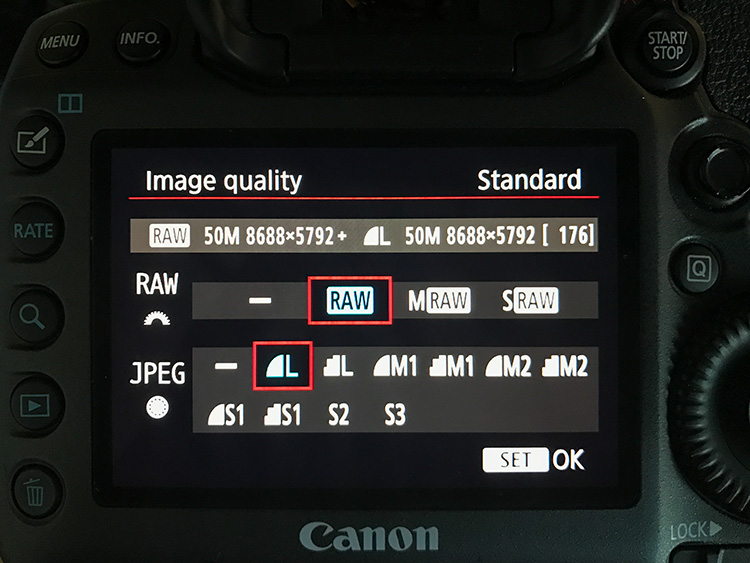
Most digital cameras have the option to change your image format between RAW and JPEG (as shown above).
When you take a picture as a JPEG, your camera automatically processes and condenses the image, leaving you with a much smaller and more compatible image file at the cost of data in the photo.
This is important to keep in mind because that lost data means less detail and a negative impact to areas in your image like white balance, color saturation, sharpness and more.
But when you take a picture in RAW format, your camera is processing and adjusting the image as little as possible, and that data/information is preserved for editing later.
Basically this means that when you adjust a RAW image in Photoshop, the program has more data to work with and can make a greater range of adjustments at a more precise level.
An example of why this is important is when you have parts of a photo that are too dark. Photoshop can bring out those dark areas in a RAW file to reveal detail that may have been too dark to see initially.
With a JPEG, your camera turned those dark areas into condensed blobs of dark pixels, and there’s less detail that Photoshop can recover.
Editing Photos
Once you’re shooting in RAW format, it’s time to improve your photos with Photoshop. There are a lot of adjustments that can be made but let’s look at some of the basics.
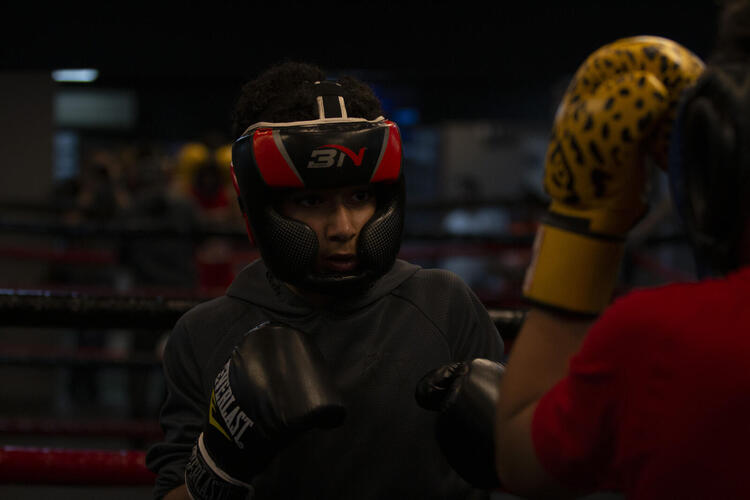
The above photo is much too dark and needs to be edited in Photoshop so it reflects what was actually photographed.
Open that RAW image in Photoshop and you’ll be greeted by sliders that can be adjusted as you like. There are quite a few so for now just worry about the most impactful ones like exposure and shadows.
The exposure slider will make the entire photo brighter or darker, and the shadows slider will brighten up or reveal any particularly dark areas like those that are in the shade.
Just by increasing the exposure and shadows value you can see how much of a difference Photoshop can make.
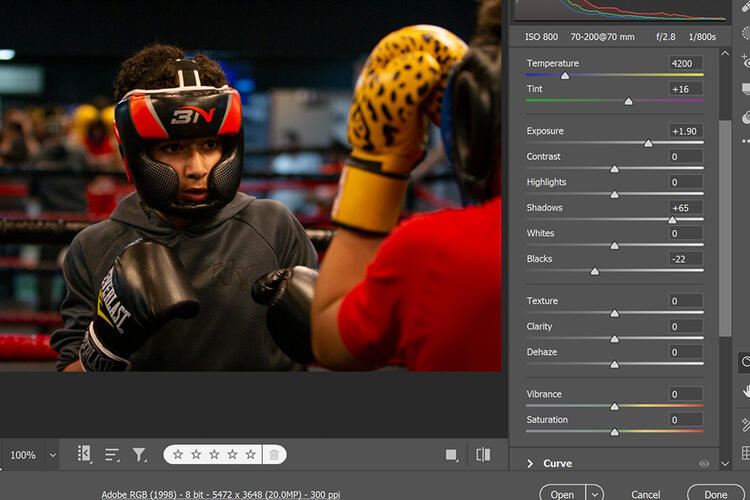
We went from a photo that was barely visible to a photo where you can clearly see the subject and the various details that were captured.
But be warned, the shadows slider can wash out the darker colors in your photo. Whenever you increase the shadows value be sure to decrease the blacks value, so it prevents the black colors in your photo from looking gray.
Also keep in mind that when it comes to the art of photography every photo is different and there are no exact values that you should be aiming for. Play around and adjust each of the sliders until you end up with a photo that you’re happy with.
When you’re done adjusting sliders, hit the “Open” button to fully open the image in Photoshop where you can crop and edit it further if you like.
Once you’re ready to save and share your image with the world, remember that you’ve been working with a RAW image file which most devices and apps (like smartphones or Instagram) can’t read.
To fix this just go to the “File” tab in Photoshop, click “Save As…” and select JPEG or another option as your file type now that your RAW editing is complete.
If you choose JPEG you’ll be greeted by a pop up JPEG options window but don’t panic. Just keep the quality slider in the 10 to 12 range so the image quality stays high then hit “OK.”
Image adjustments complete. Now all that's left to do is congratulate yourself because you went from no experience to knowing the basics of how to improve your photos with Photoshop.
")
 Israeli Prime Minister Benjamin Netanyahu in Jerusalem on March 19, 2026 and US President Donald Trump in Morristown, New Jersey, on May 22, 2026.")
")
")
